

Spark Joy with DIY Electronic Christmas Cards
This holiday season, why not add a touch of technology to your festive greetings? In this DIY blog post, we’ll guide you through the steps to create electronic Christmas cards that light up with LEDs, bringing warmth and joy to your loved ones. Let’s dive into the world of DIY electronics and craft a holiday card that’s sure to stand out!
Materials Needed:
- Cardstock or heavy paper for the card
- Copper tape
- LEDs (assorted colors)
- Coin cell batteries (CR2032)
- Small binder clips or paper clips
- Craft knife or scissors
- Hole punch
- Clear tape or double-sided tape
- Decorative elements (optional)
- Markers or colored pencils
Step 1: Design Your Card

Start by designing the layout of your electronic Christmas card. Consider where you want to place the LEDs and any decorative elements. Keep in mind the placement of the battery and copper tape pathways.
Step 2: Create the Circuit
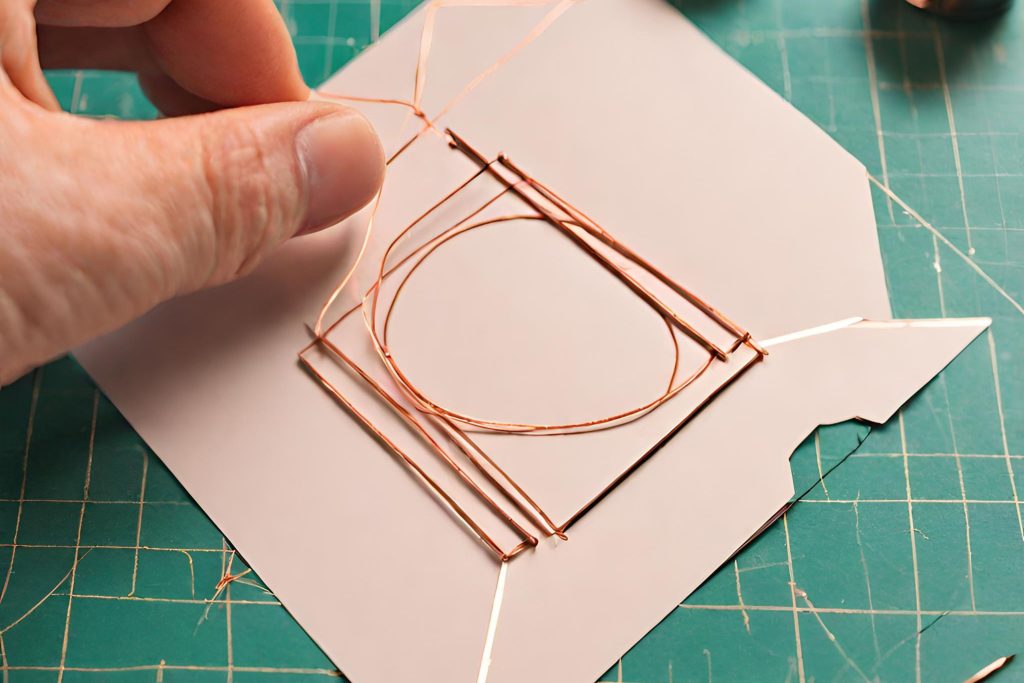
Using copper tape, create a simple circuit on the cardstock. The circuit should connect the positive side of the LED to the positive side of the battery and the negative side of the LED to the negative side of the battery. Ensure the copper tape is securely adhered to the paper.
Step 3: Attach LEDs
Place the LEDs on the card according to your design, making sure they align with the copper tape circuit. Bend the LED legs and attach them to the copper tape using small binder clips or paper clips to secure them in place.
Step 4: Add the Battery
Attach the coin cell battery to the circuit. The positive side of the battery should connect to the positive side of the LED, and the negative side should connect to the negative side of the LED. Use clear tape or double-sided tape to secure the battery in place.
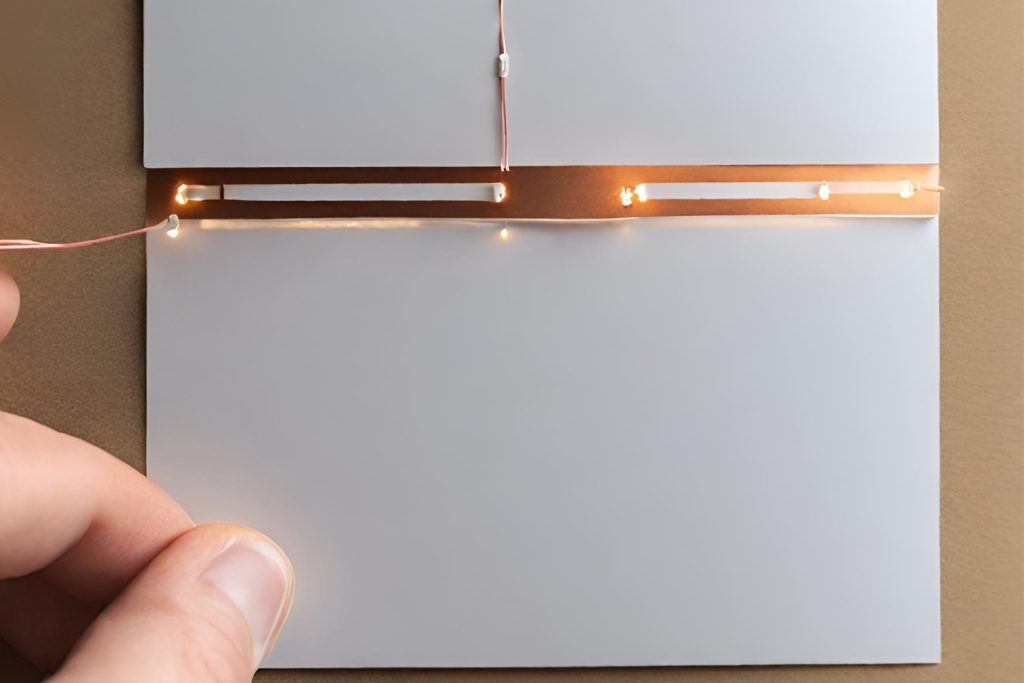
Step 5: Test the Lights

Fold the card to close the circuit and test the lights. If the LEDs don’t light up, double-check your connections and make any necessary adjustments.
Step 6: Secure the Circuit
Once you’re satisfied with the placement and functionality, secure the copper tape and connections with additional tape to ensure everything stays in place when the card is opened and closed.
Step 7: Personalize Your Card

Now it’s time to get creative! Add your personal touch to the card by decorating the surrounding area, writing a heartfelt message, and incorporating any additional festive elements.
Step 8: Finishing Touches
Complete your DIY electronic Christmas card by adding final touches. Consider using a hole punch to create a small opening for the LEDs to shine through, enhancing the visual appeal.
Congratulations! You’ve just created your first of many electronic Christmas cards that will surely dazzle your friends and family. Share the joy of the season with this delightful combination of traditional holiday greetings and a touch of DIY electronics. Wishing you a Merry Christmas filled with love, light, and creativity!